
Front Matter, Author Info & Backmatter
Front matter, author contact info, and backmatter are the pieces that turn a manuscript into a submission package. Scriblit keeps all three as document-owned metadata — separate from your story content — and gives you one place, the Design dialog on the Submission tab, to control how they are presented.
Front matter
Front matter is the title, byline, and pitch that sit at the top of your manuscript: the parts an editor or agent sees before the story itself starts. Scriblit stores these as fields on the document, not as text typed into the manuscript body, so they can be projected onto a title page, folded into the top of your first page, or both.
Open the Front matter section of the Submission Design dialog from the Submission tab’s Design button (or from File → Send → Design). The Title Page button on the Submission tab opens the same dialog deep-linked straight to this section.
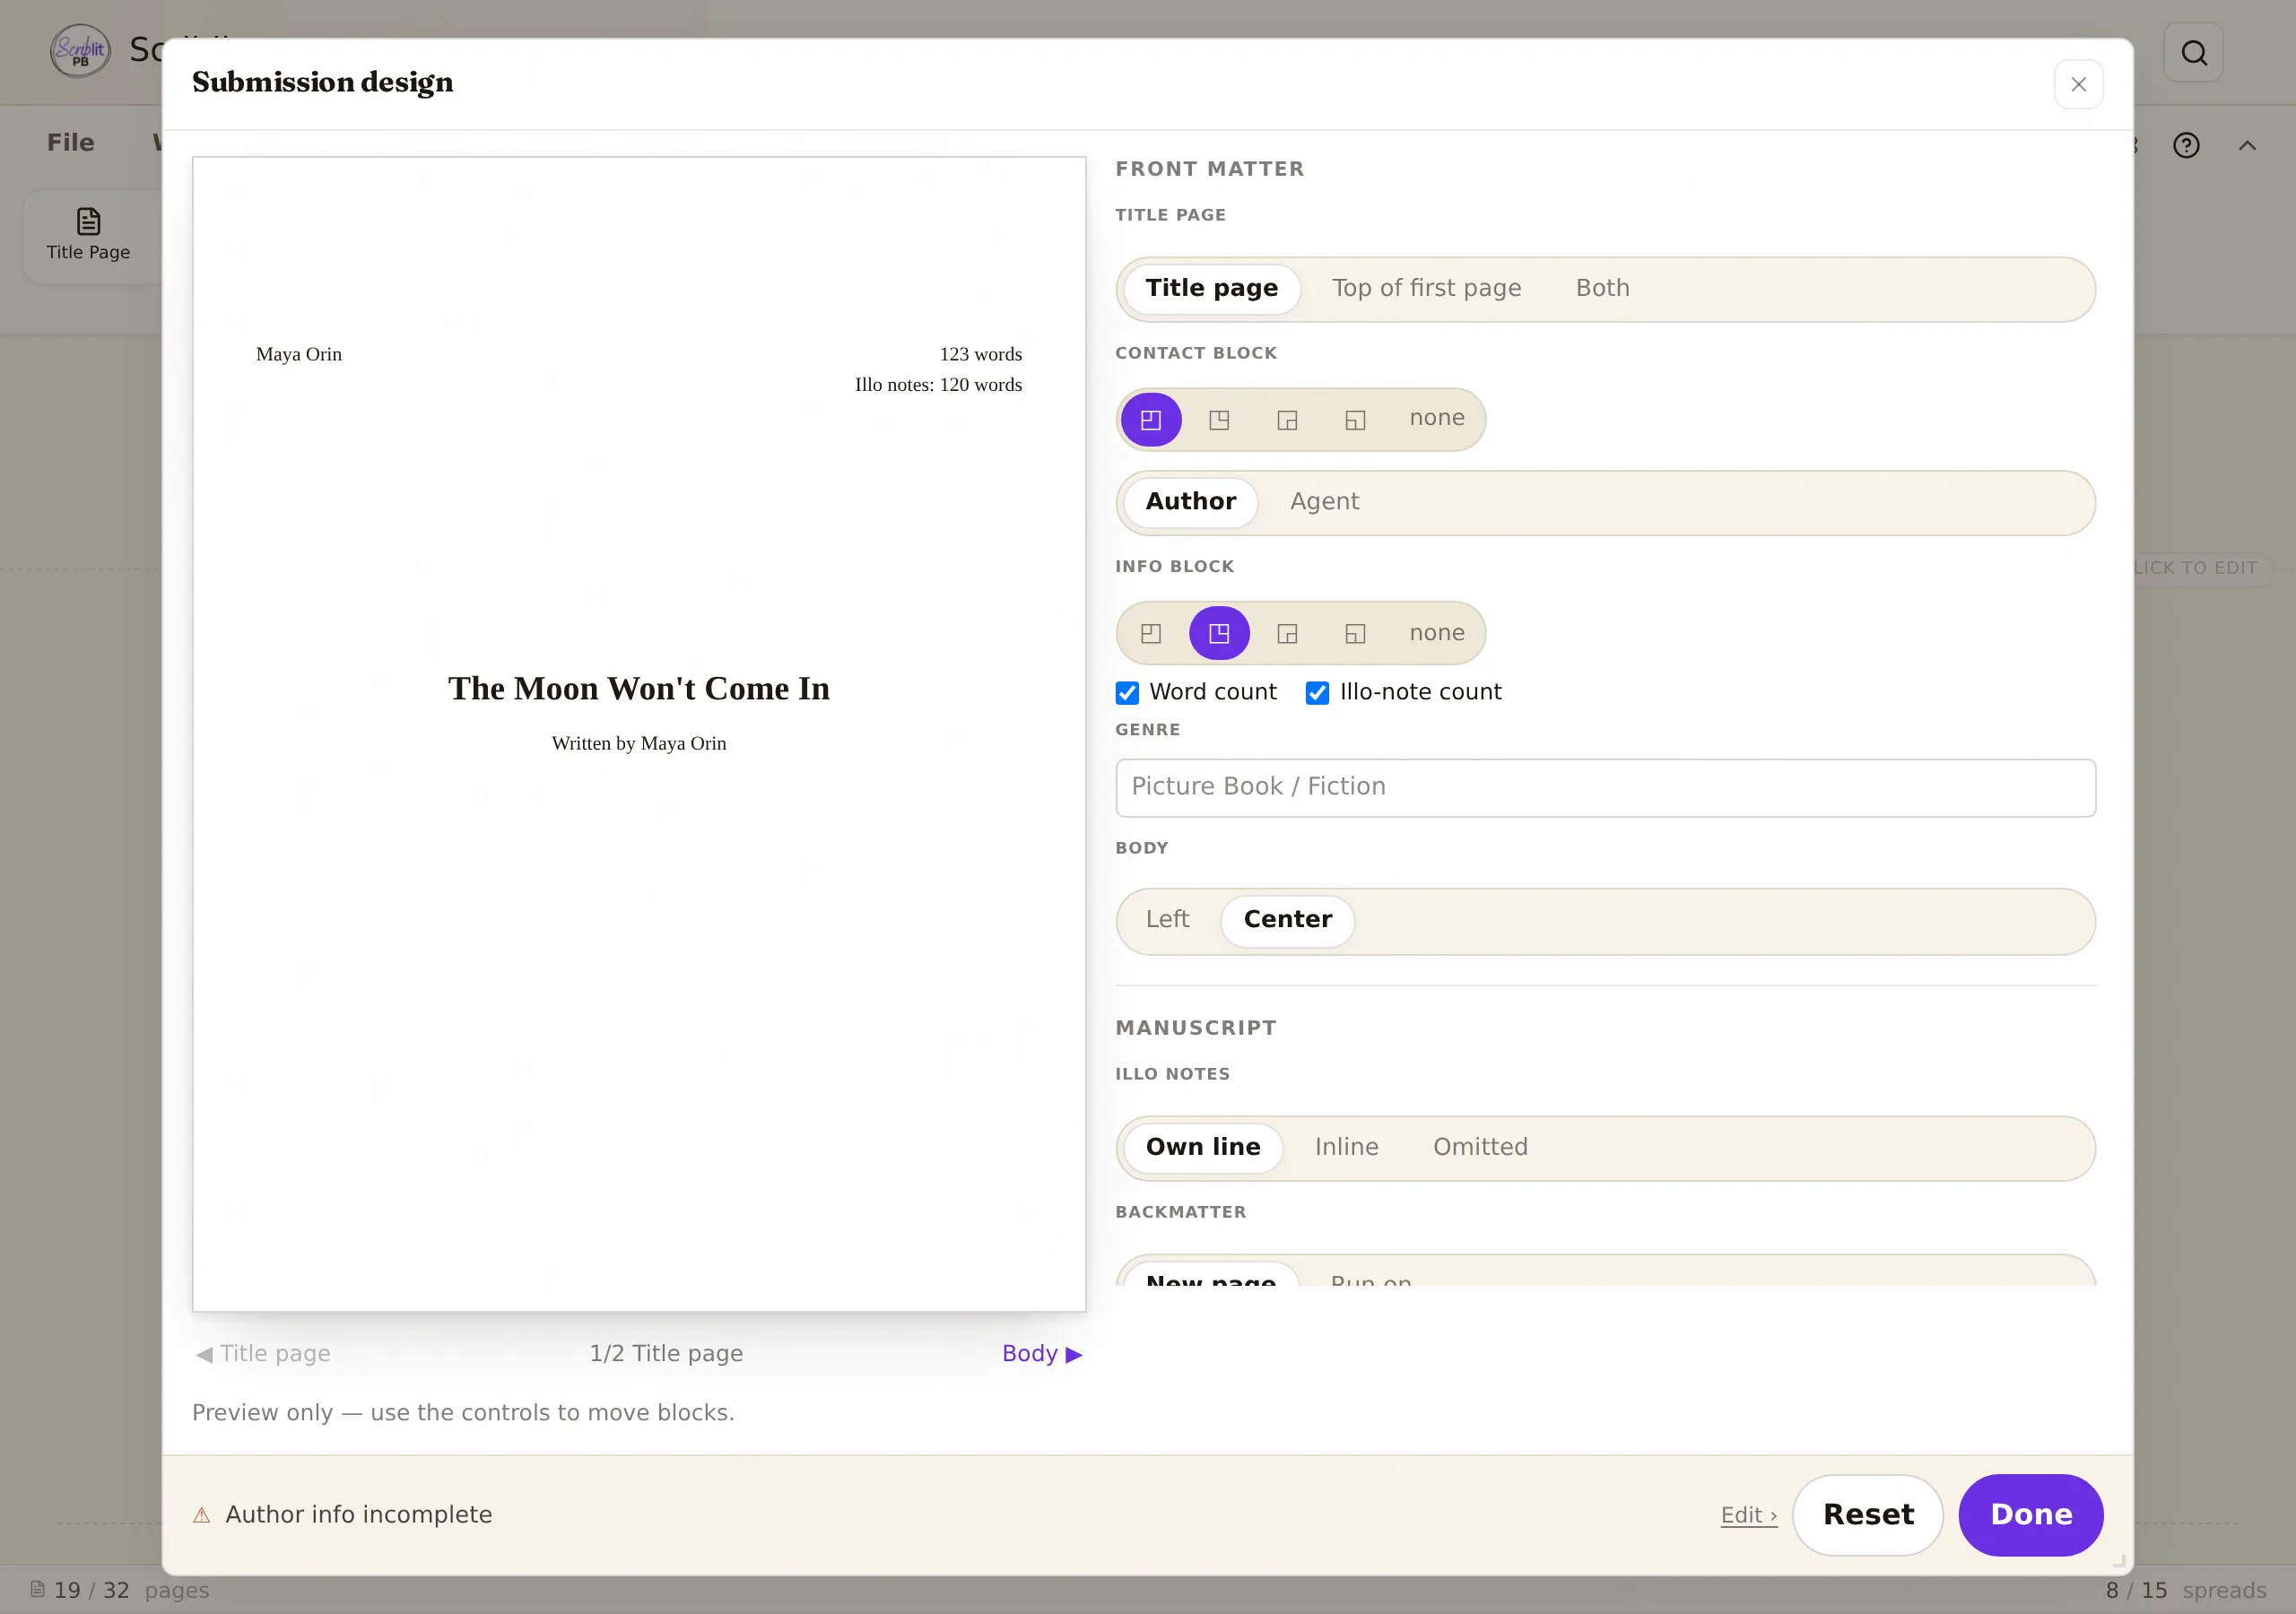
Title page projection
Choose where your title, byline, and pitch appear:
- Title page — on their own page, ahead of the manuscript.
- Top of first page — stacked above the story on page one, with no separate title page.
- Both — a title page and a repeated block on page one.
If your title and byline are both empty, Scriblit automatically omits front matter rather than exporting a blank title page — the dialog marks this with an [omitted = automatic] note under the control.
Contact block
A corner picker places your contact block in one of the title page’s four corners, or turns it off entirely (None). Next to it, Contact shows switches the block between your Author and Agent details — the same two sets you edit in the Author Info dialog below.
Info block
A second corner picker places an info block — your genre, and optionally a word count and illustration-note count — independently of the contact block. Checkboxes turn the word count and illo-note count on or off, and a Genre field feeds the text shown (for example, “Picture Book / Fiction”).
Body alignment
Sets whether the title-page body (title, byline, pitch) is Left or Center aligned.
The corner-placement grid, the live preview, and every other title-page control are covered in detail on the Title Page page — this section is the front-matter half of that same dialog.
Author (or Agent) Info
Open Author Info from the Submission tab to edit the contact details that can appear on your title page, in your query letter, and in your manuscript’s running header.
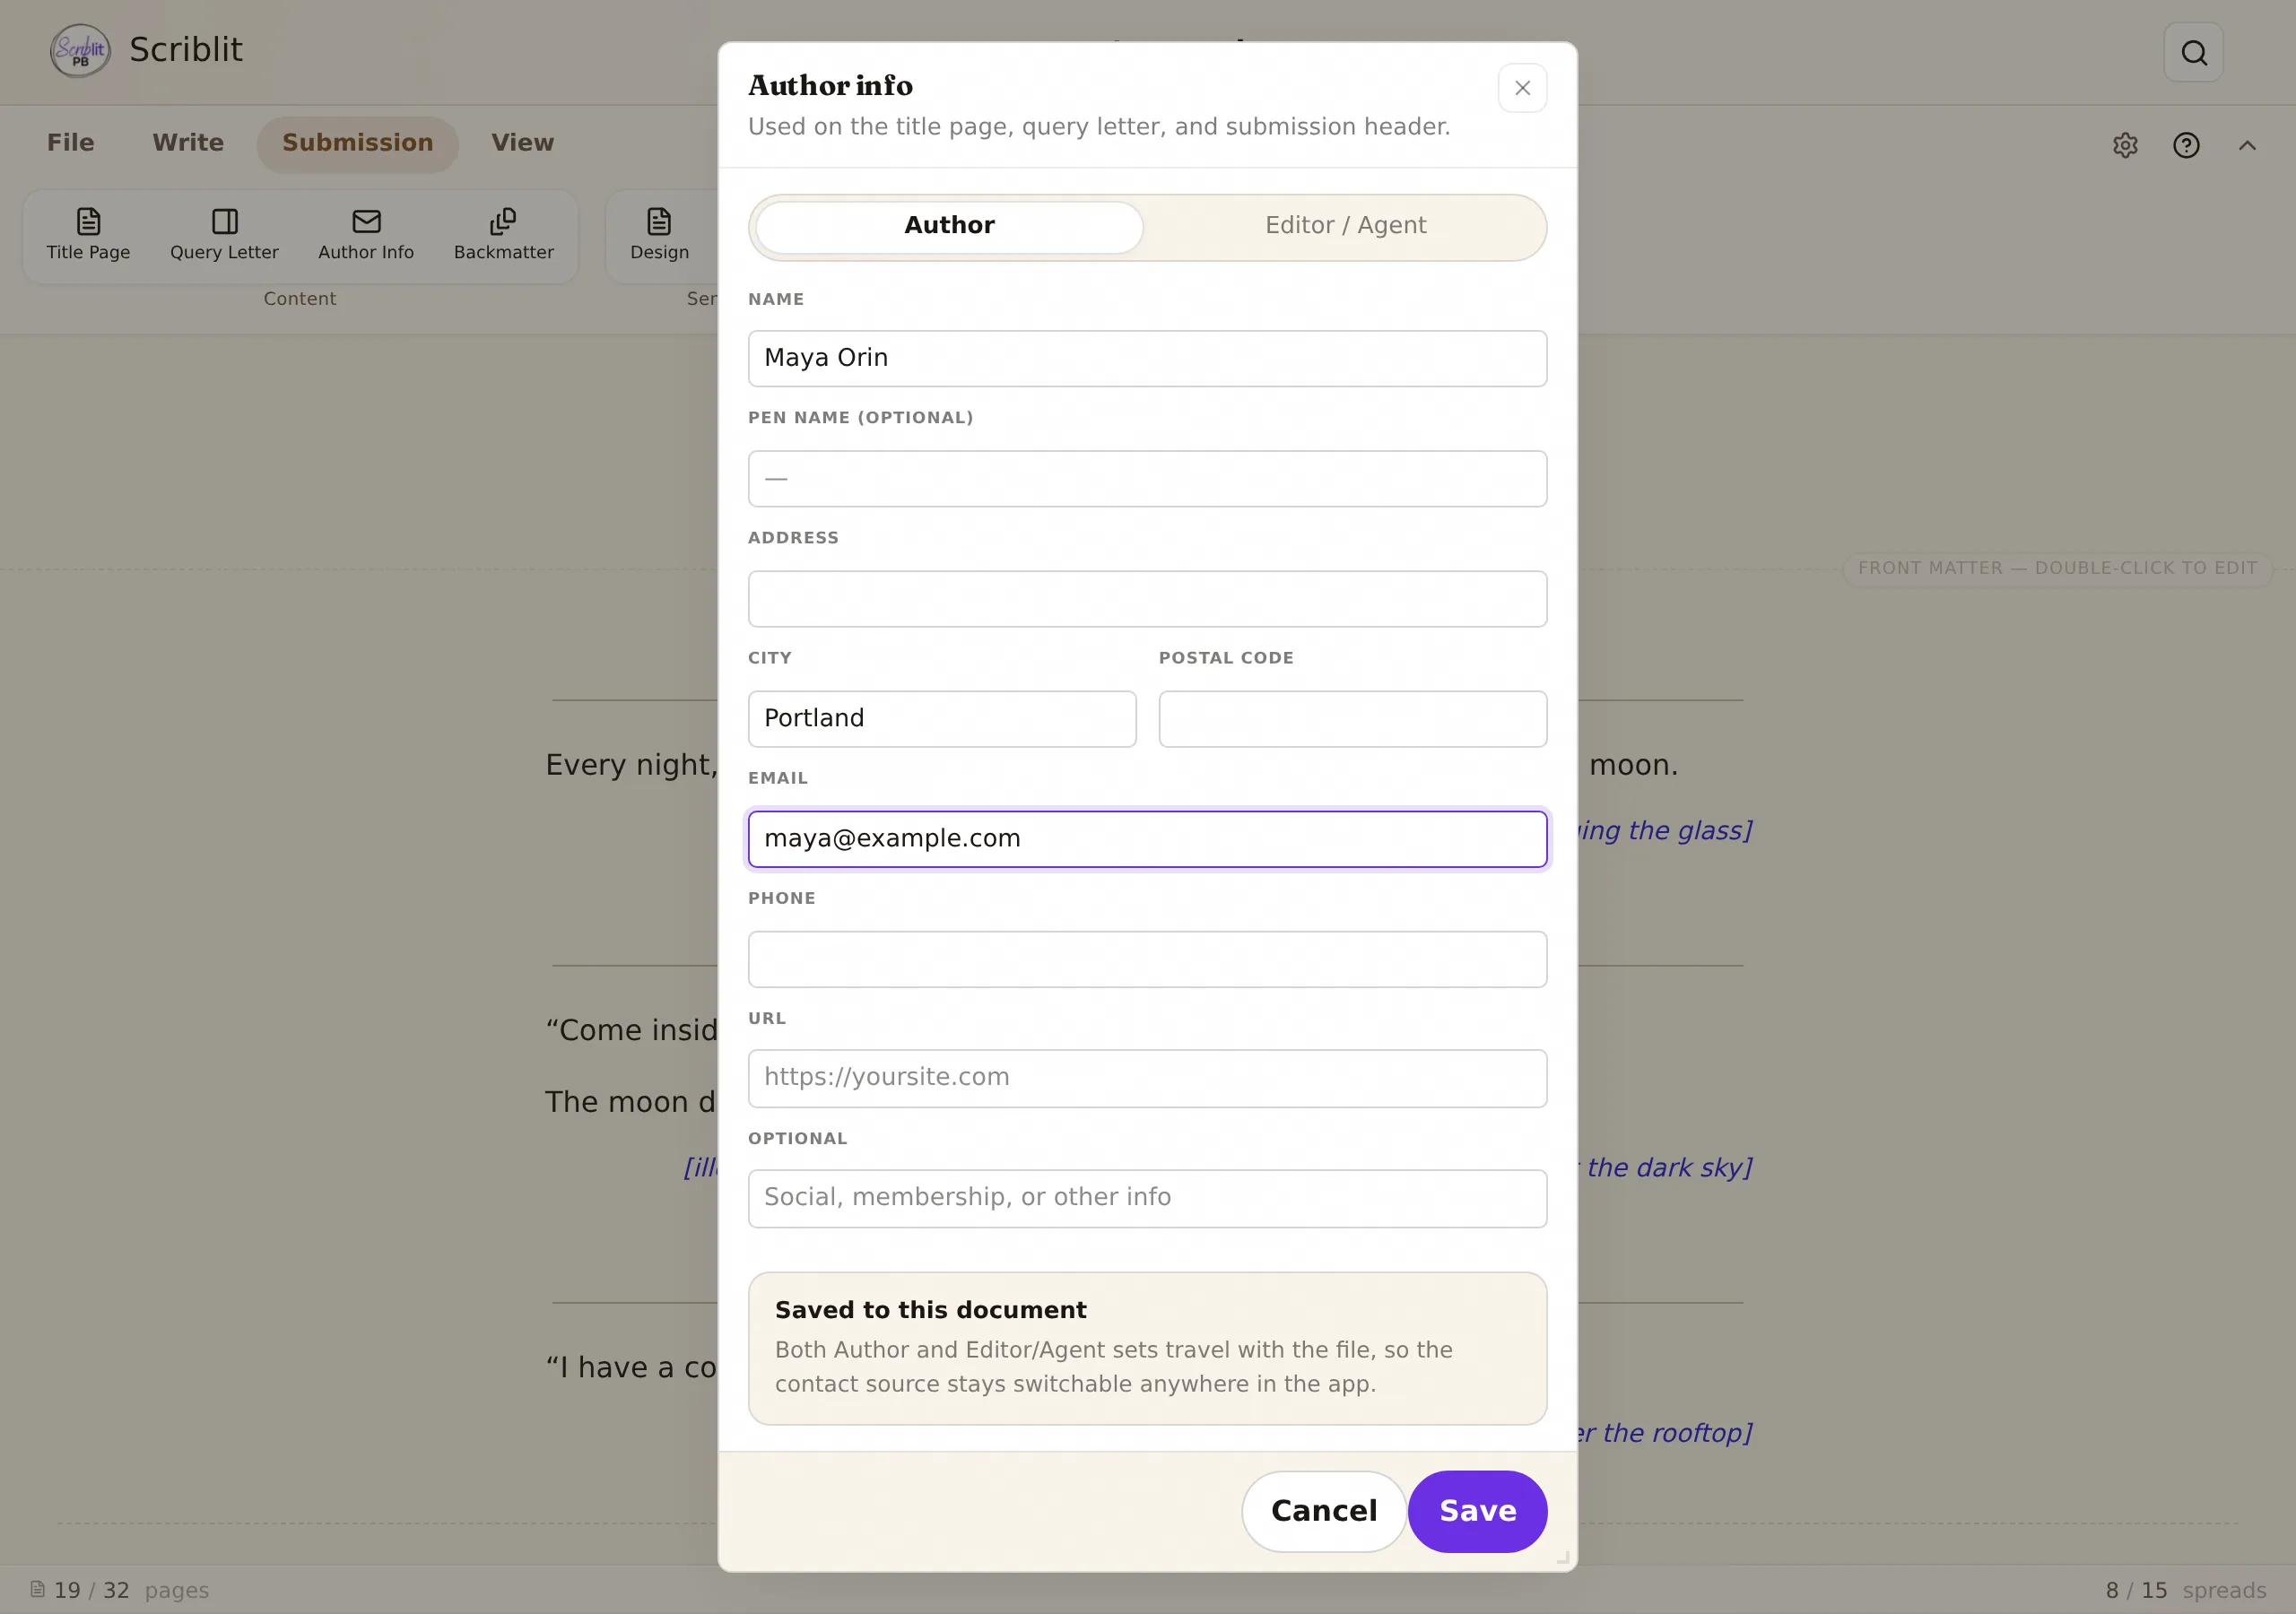
A pill at the top switches which set of details you are editing:
- Author — Name, Pen name (optional), mailing address (address, city, postal code), email, phone, URL, and an optional field for social or membership info.
- Editor / Agent — Agency or imprint, contact name, mailing address, email, and phone.
Both sets are saved together, inside your document’s .spb file — editing one never overwrites the other, so you can switch which one an export uses without retyping anything.
Feeding the running header
The last word of your Author Name becomes the last name Scriblit prints in your manuscript’s running header on pages 2 and later. If Name is empty, the dialog reminds you that running headers will omit the last name until you fill it in.
Choosing which set an export uses
The Author Info dialog edits both sets, but it doesn’t decide which one shows up on the page — that is the Contact shows control (Author / Agent) in the Design dialog’s Front matter section, described above. Set the contact block’s slot to None there if you would rather leave contact details off the title page entirely.
Backmatter
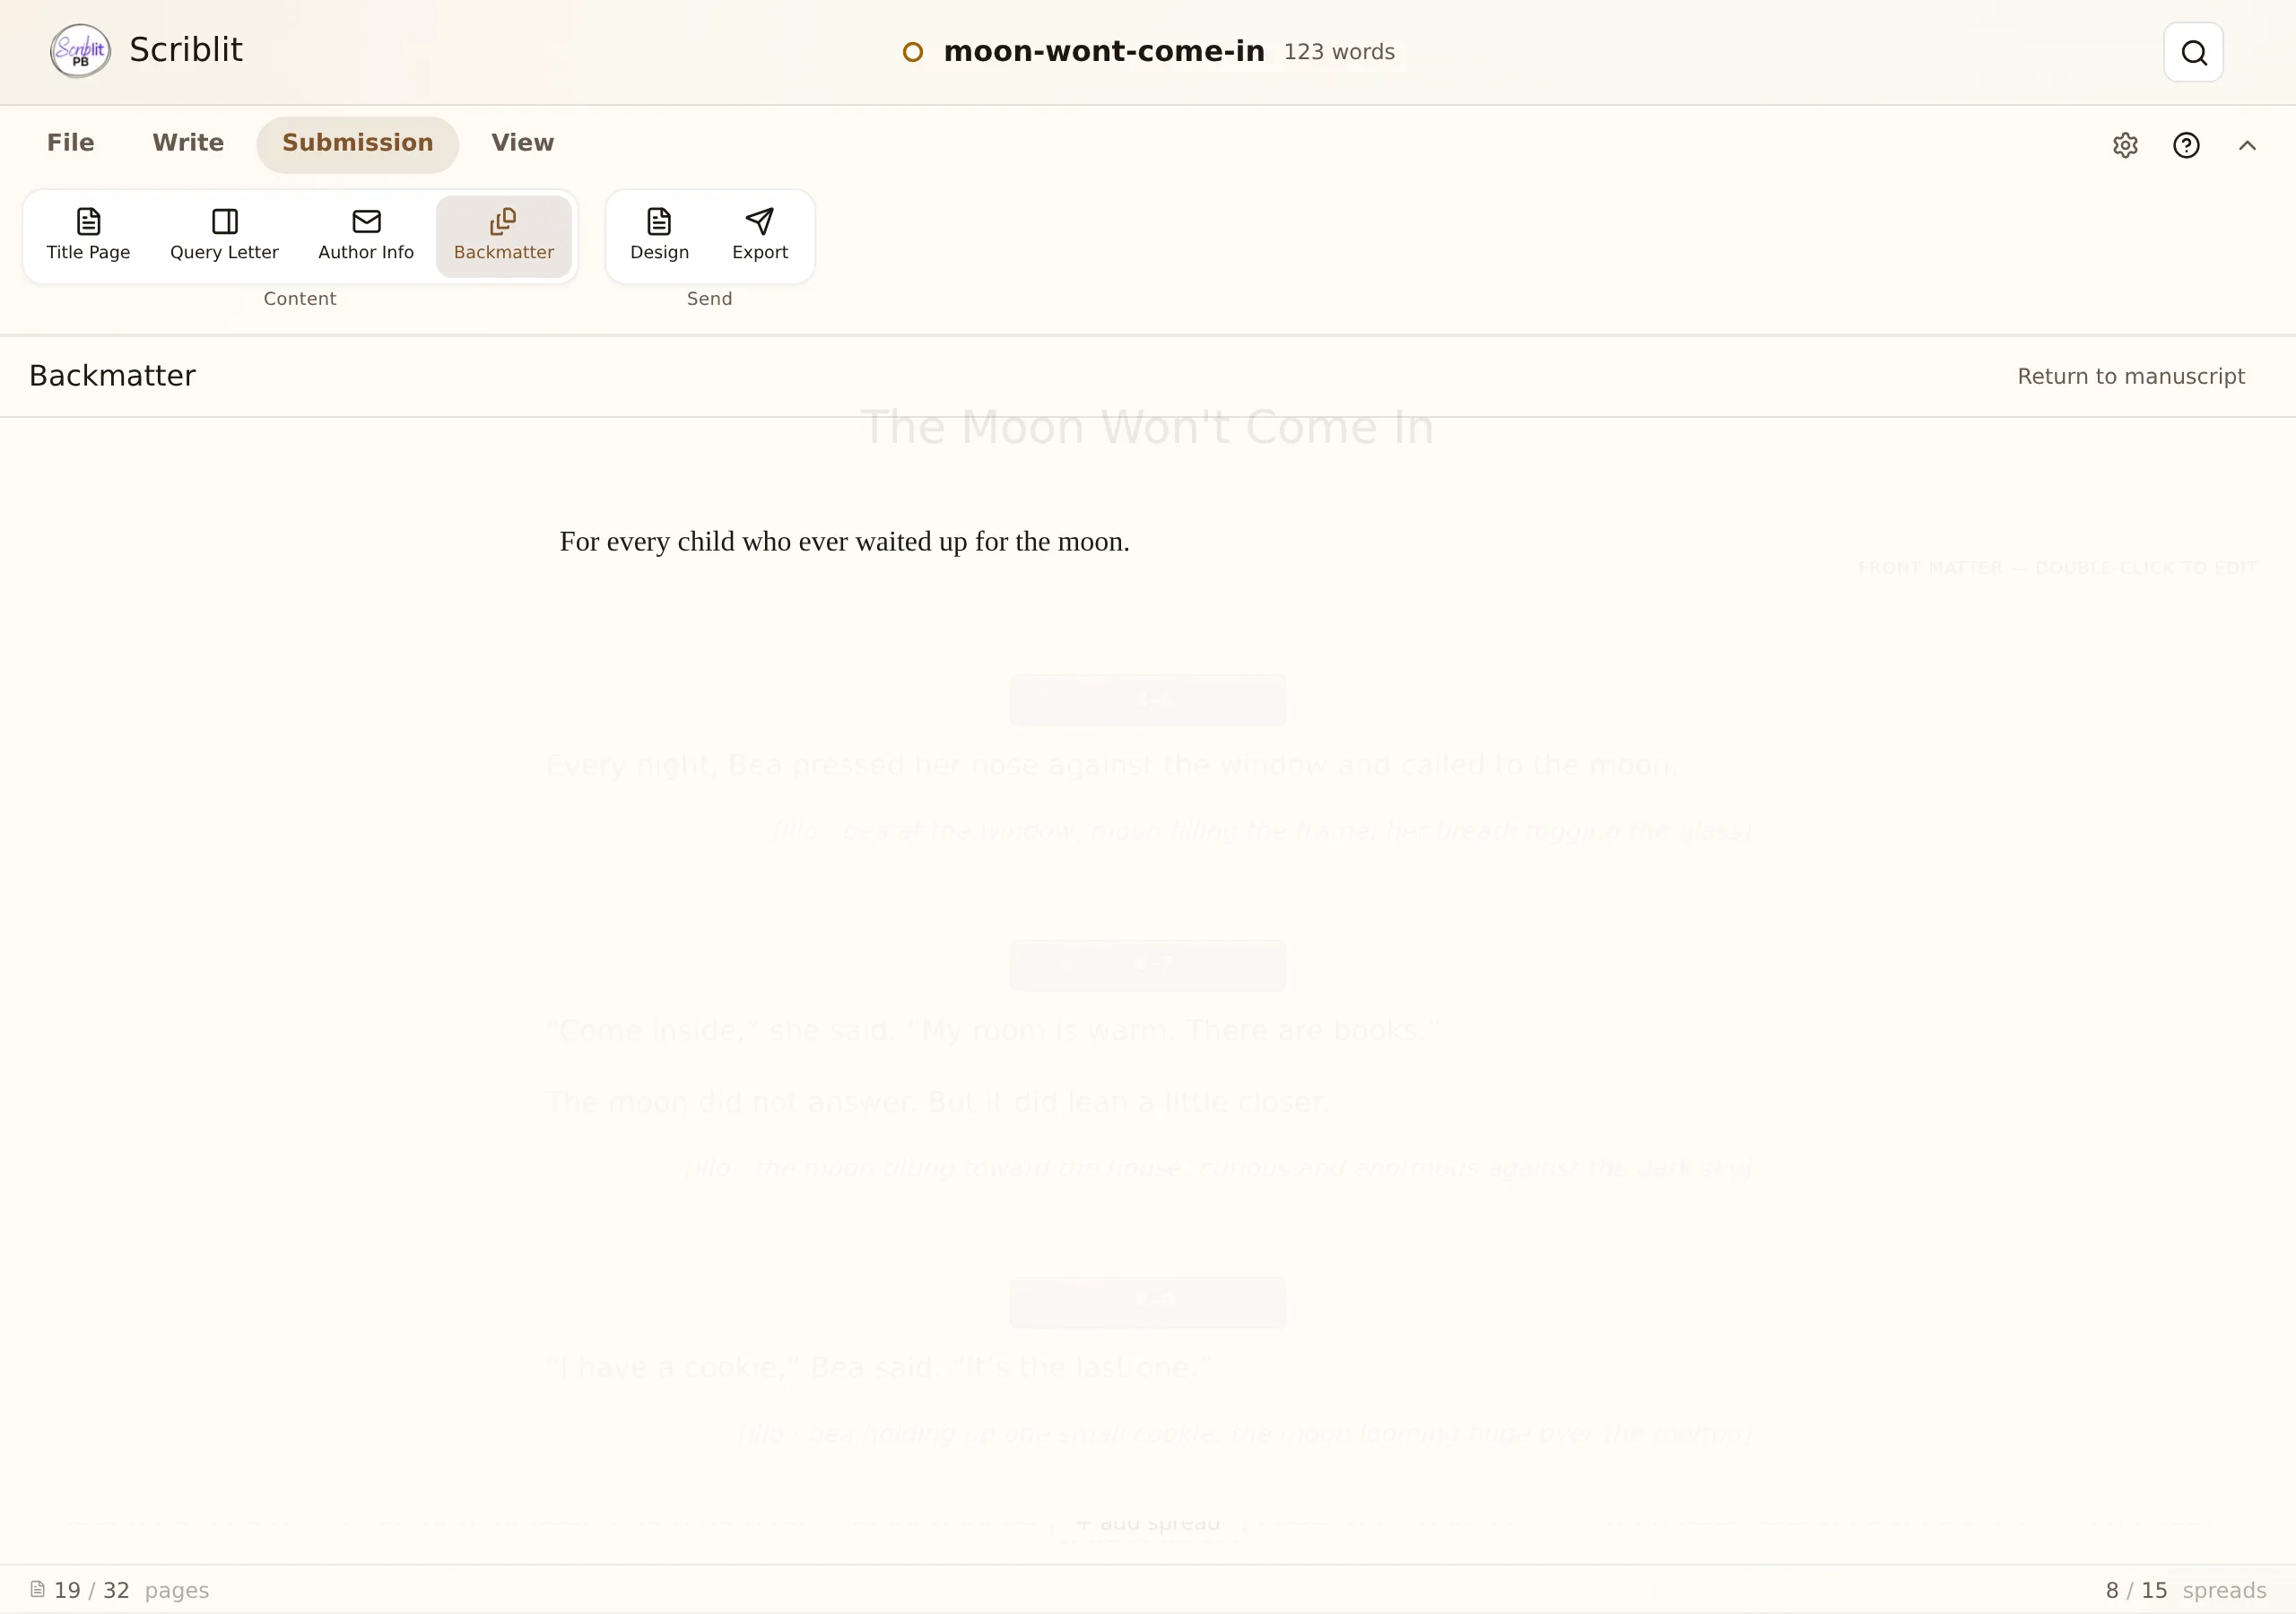
Backmatter is optional content that runs after your story — a dedication, acknowledgments, or an author’s note. Like front matter, it is stored as its own field on the document rather than typed into the manuscript body, so it can be reflowed independently at export time.
Open it from the Backmatter button in the Submission tab’s Content group. This opens a dedicated writing surface — a plain-text area, separate from the manuscript editor — with a Return to manuscript button to go back to your story when you are done.
Placement
In the Design dialog’s Manuscript section, Backmatter placement chooses how it meets the end of your story at export:
- New page — backmatter starts on its own page after the manuscript.
- Run on — backmatter continues directly after the last spread, on the same page if there is room.
The live preview pane in the Design dialog (switch it to the Body page) shows a marker for whichever placement you have chosen, right after the sample manuscript text.
For how these pieces ride into a finished file, see Saving & Exporting.